
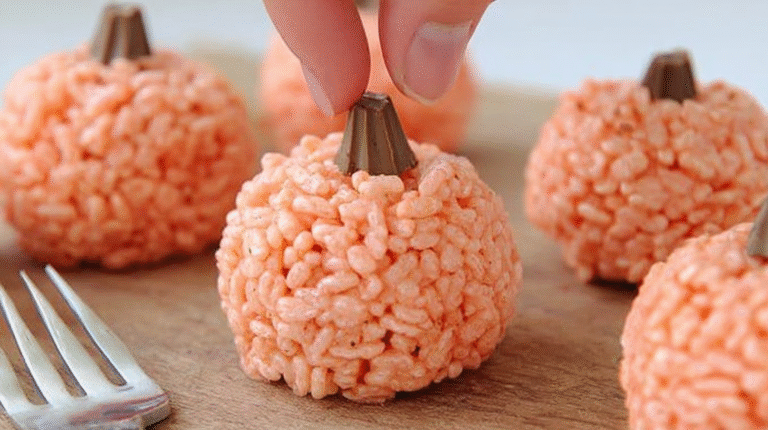
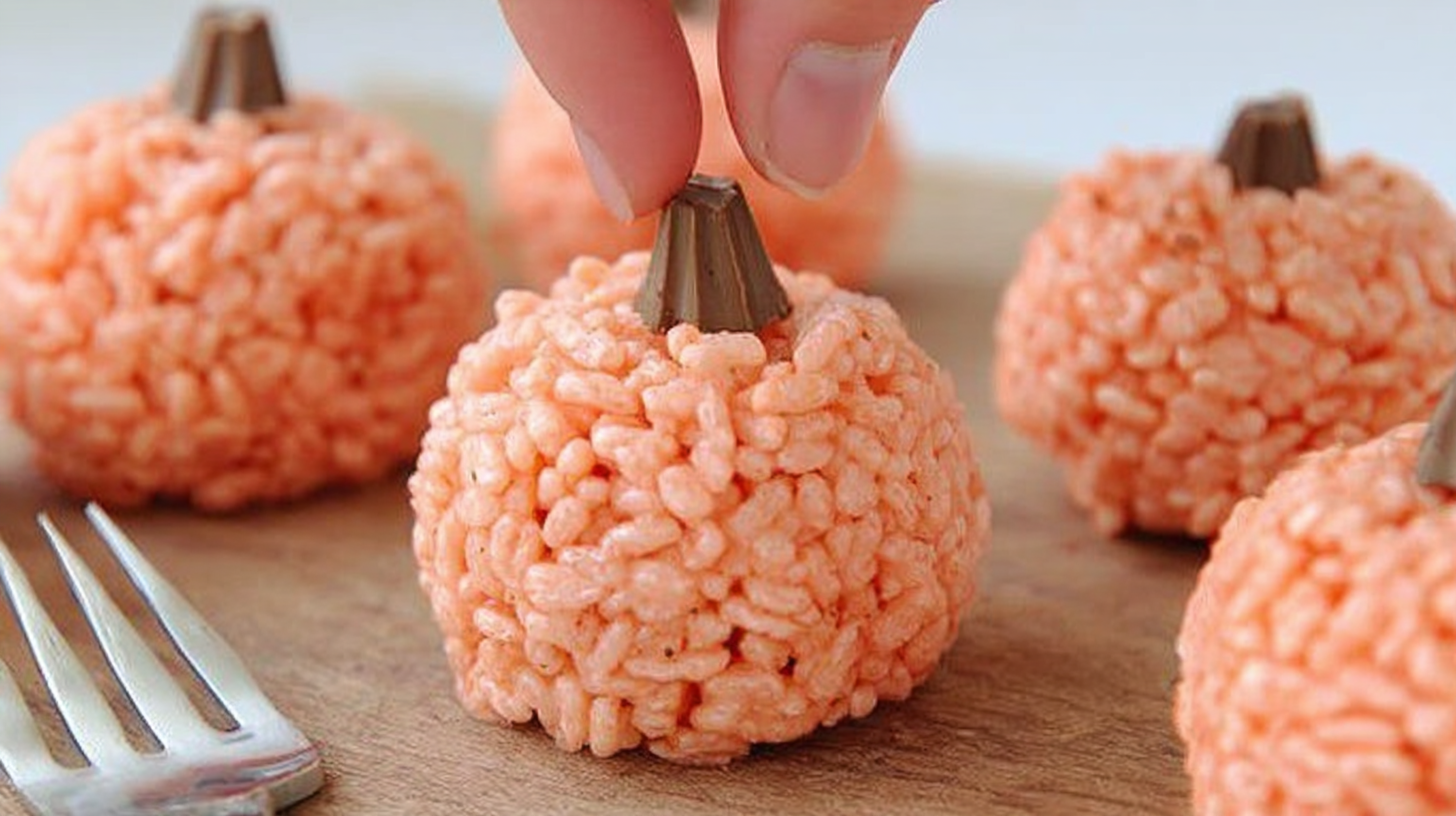
These Rice Krispie Treat Pumpkins are the cutest no-bake Halloween treats you’ll ever make—and trust me, they taste just as good as they look! With gooey marshmallows, crispy cereal, and a burst of fall vibes in every bite, these little pumpkin-shaped delights are perfect for parties, school snacks, or just a fun kitchen project with the kids. They’re festive, foolproof, and oh-so-fun to make. Bonus? You can whip up a whole batch in under 30 minutes! Perfect for Halloween Themed Food lovers and anyone craving Fun Halloween Snacks.
Looking for another spooky marshmallow treat? Check out our Marshmallow Rice Bubbles Halloween Brains recipe!
Table of Contents
Why You’ll Love This Recipe
- Super simple and no baking required
- Kid-friendly and perfect for Easy Halloween Snack Ideas
- Fun to decorate and customize for Spooky Food displays
- Ready in under 30 minutes
- Deliciously chewy with a buttery marshmallow twist
Recipe Snapshot
| Feature | Details |
|---|---|
| Category | Dessert |
| Cuisine | American |
| Prep Time | 15 minutes |
| Cook Time | 5 minutes |
| Total Time | 20-25 minutes |
| Servings | About 12 pumpkins |
Ingredients
- Rice Krispies cereal – The crispy base that gives our pumpkins their signature crunch.
- Mini marshmallows – Melted into buttery bliss to hold everything together.
- Unsalted butter – Adds richness and keeps the treats soft.
- Orange food coloring – Gives our pumpkins that classic Halloween hue.
- Tootsie Rolls or pretzel sticks – For the “pumpkin stems.”
- Green M&M’s or icing – Adds a leafy touch on top.
Psst…scroll down for the full recipe card with measurements and instructions!
How to Make Rice Krispie Treat Pumpkins
Step 1: Melt the Butter and Marshmallows
In a large pot over low heat, melt the butter. Add the mini marshmallows and stir continuously until fully melted and smooth.
Step 2: Add Color and Cereal
Remove the pot from heat and stir in the orange food coloring. Once it’s fully mixed, fold in the Rice Krispies cereal until evenly coated.
Step 3: Shape Your Pumpkins
Let the mixture cool for a minute or two—just enough to handle safely. Grease your hands with butter or nonstick spray and scoop out portions to roll into balls. Press a Tootsie Roll or pretzel stick into the top of each ball for the stem.
Step 4: Add Leafy Details
Stick a green M&M next to the stem or use green icing to pipe on leaves or vines. Let them set for 10–15 minutes before serving.
Pro Tips
- Use gloves or buttered hands to prevent sticking while shaping.
- Don’t press too hard when forming the balls—you want them light and chewy!
- For extra flavor, add a splash of vanilla to the marshmallow mix.
Flavor Variations
- Swap orange coloring for green and turn them into Frankenstein balls!
- Use cocoa cereal for a chocolatey twist—perfect if you love Salty Halloween Snacks with a sweet edge.
- Mix in mini chocolate chips for a sweet surprise.
Serving Suggestions
Serve these on a Halloween platter with spooky decorations or wrap them individually in cellophane for party favors. They’re a big hit at any Adult Halloween Party or kid-friendly bash. Try them alongside your favorite Healthy Halloween Snacks or Fall Snacks for a well-rounded treat table.
Make-Ahead & Storage
You can make these up to two days in advance. Just store them in an airtight container at room temperature.
Leftovers
Got extras? Lucky you! These stay soft and tasty for up to 3 days when stored properly.
Freezing
Freeze individually wrapped pumpkins in a zip-top bag for up to a month. Let thaw at room temp before enjoying.
Reheating
No reheating needed! But if they’ve gotten a little firm, a quick 5-second zap in the microwave does the trick.
FAQs
Can I use large marshmallows instead of mini?
Yes, just be sure to measure by weight and melt them slowly to avoid burning.
How do I keep the mixture from sticking to my hands?
Grease your hands with butter or spray with nonstick cooking spray.
Can I make these in advance?
Absolutely! These are perfect make-ahead treats for Easy Halloween Snacks For Party.
What can I use instead of food coloring?
You can try natural alternatives like beet or carrot juice, but results may vary.
Final Thoughts
Whether you’re planning a Halloween bash or just want something festive and fun, these Rice Krispie Treat Pumpkins are a total win. They’re easy, adorable, and a guaranteed crowd-pleaser. So go on—grab that cereal box and let’s make some magic. These make the ultimate addition to your Halloween Snacks For Adults list. Happy Halloween and happy munching!
Rice Krispie Treat Pumpkins
Ingredients
Equipment
Method
- In a large pot over low heat, melt the butter. Add marshmallows and stir until melted and smooth.
- Remove from heat. Stir in orange food coloring until evenly tinted, then fold in the Rice Krispies until fully coated.
- Let cool slightly. Grease your hands and form the mixture into pumpkin-sized balls. Insert a Tootsie Roll or pretzel stick in the center of each for a stem.
- Decorate with green M&Ms or pipe on icing to resemble leaves or vines. Let set for 10–15 minutes before serving.