
Table of Contents
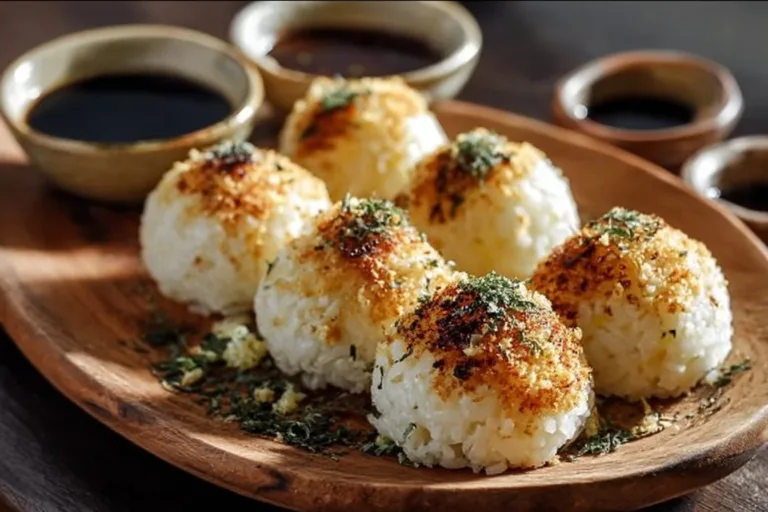
On a chilly autumn afternoon, the kind where the wind rustles outside and leaves dance like confetti, my kitchen was filled with the nostalgic aroma of cooking rice balls. It was a cherished recipe passed down from my grandmother, who would whip up batch after batch, filling the house with warmth and joy. The smell of sizzling oil combined with the delightful scent of melting cheese always seemed to wrap around me like a cozy blanket. Each bite felt like a warm hug, with the crispy, golden exterior giving way to a soft, cheesy center.
Whether served as a snack or a main dish, these rice balls have a special kind of magic that brings loved ones together. I can still hear the laughter of family around the dinner table, racing to grab the freshly made rice balls, their love reflected in every scrumptious morsel. Today, I invite you to rediscover this heartwarming dish—the perfect choice for sharing cozy nights at home or whipping up a fun meal with family.
Why You’ll Love This Recipe
- Quick and Easy: Perfect for busy weeknights, you can whip these up in no time!
- Versatile and Fun: Great for snacking or as an appetizer for parties—everyone can enjoy!
- Healthier Option: Made with wholesome ingredients, they pack a nutritious punch!
- Bursting with Flavor: With gooey cheese and fragrant herbs, each bite is a delightful experience.
- Adapts to Any Mood: Play around with fillings and flavors—no two batches are ever the same!
Ingredients
2 cups cooked rice
Base of the dish; opt for short-grain rice for that perfect sticky texture.1 cup grated cheese (mozzarella or parmesan)
Adds a deliciously gooey interior; mozzarella gives a melty pull, while parmesan adds a nutty flavor.1/2 cup breadcrumbs
Helps to bind the mixture together and creates that golden crunch when frying.1/4 cup chopped parsley
Freshness in every bite; feel free to substitute with other herbs like basil or cilantro for a twist.1 egg, beaten
Acts as a binder and helps achieve an ideal crispy texture while frying.Salt and pepper to taste
Brings out all the delightful flavors—don’t skip this step!Oil for frying
Use a neutral oil like vegetable or canola for best results; you want that satisfying crunch!
Full recipe card is below.
How to Make It
1. Mix the ingredients
In a sturdy mixing bowl, combine the cooked rice, grated cheese, breadcrumbs, chopped parsley, and the beaten egg. Sprinkle in some salt and pepper to tantalize those taste buds. As you mix, you’ll notice the comforting aroma of the cheese mingling with the rice—it’s truly heavenly!
2. Shape the mixture
With clean hands, grab a handful of the rice mixture and roll it into a small ball, about the size of a golf ball. Keep the balls compact to ensure they hold their shape when fried. Don’t worry if they aren’t perfect—each little rice ball is unique, just like you!
3. Heat the oil
In a large frying pan, pour in enough oil to cover the bottom and heat it over medium heat. You’ll know it’s ready when just a sprinkle of breadcrumbs sizzles happily in the oil. The anticipation is half the fun—get ready for some deliciousness!
4. Fry the rice balls
Carefully place the rice balls in the hot oil, making sure not to overcrowd the pan. Fry for about 5-7 minutes, turning them gently until they achieve a deep golden brown color on all sides. As they cook, your kitchen will fill with that irresistible smell of frying perfection—you might just find it hard to wait!
5. Drain and serve
Once crispy, lovingly remove the rice balls with a slotted spoon, letting them drain on paper towels. Serve them warm; the gooey interior will be begging to be enjoyed!
Pro Tips for Success
- Consistency: Make sure the rice is cool before mixing to prevent clumping!
- Test Fry: Cook one rice ball first to check your oil temperature and seasoning.
- Batch Cooking: Make a double batch! These are crowd-pleasers, and leftovers work wonders.
- Resting Time: Let formed rice balls sit for a few minutes before frying; they’ll hold shape better.
Flavor Variations
Feel free to get creative! Want to spice things up? Add in some chopped sun-dried tomatoes or olives. Incorporate seasonal veggies like roasted squash in the autumn or fresh spinach in the spring for a refreshing twist. Different cheeses can add interesting flavors too—think sharp cheddar or creamy goat cheese!
Serving Suggestions
Enjoy your rice balls by themselves, or pair them with a homemade marinara sauce for dipping. For a beautiful plating, stack them high and sprinkle with extra parsley or a drizzle of olive oil. A crisp side salad and a glass of sparkling water or your favorite wine make the meal feel special!
Make-Ahead & Storage
Prepare the rice ball mixture a day in advance and keep covered in the refrigerator. Just shape them and fry when you’re ready to indulge! Once fried, leftovers can be stored in an airtight container for up to three days.
Leftovers
Use leftover rice balls as a delicious addition to a lunchtime salad, add them to pasta, or heat them up for a quick snack. You can also crumble them and use as a crispy topping for casseroles!
Freezing
Absolutely! Lay the uncooked rice balls on a baking sheet in the freezer until solid, then transfer to a freezer-safe bag. They’ll hold their flavor for up to three months. Thaw overnight in the fridge before frying.
Reheating
For the best texture, reheat in a skillet over medium heat until crispy again. If you need it fast, the microwave works too, but your rice balls may lose some of that delightful crunch!
FAQs
Can I use leftover rice for this recipe?
Absolutely! Just ensure it’s properly cooled first for easy mixing.
Can I make these gluten-free?
Yes! Substitute breadcrumbs with gluten-free options or crushed rice cereal.
How can I make these vegan?
You can replace the egg with a flax egg and use a dairy-free cheese alternative.
What dipping sauces can I serve with rice balls?
Marinara, garlic aioli, or a light ranch dressing all pair beautifully with these tasty treats!
Final Thoughts
As the sun sets and the world quiets down, the simple act of enjoying homemade rice balls brings comfort and love to the table. Each bite is a reminder of family traditions and the warmth that a home-cooked meal can provide. So gather your friends and family, create these delightful little orbs of joy, and celebrate the intimate moments that turn into cherished memories. Happy cooking!

Rice Balls
Ingredients
Method
- In a sturdy mixing bowl, combine the cooked rice, grated cheese, breadcrumbs, chopped parsley, and the beaten egg. Sprinkle in some salt and pepper.
- With clean hands, grab a handful of the rice mixture and roll it into a ball, about the size of a golf ball.
- In a large frying pan, pour in enough oil to cover the bottom and heat it over medium heat.
- Carefully place the rice balls in the hot oil, frying for about 5-7 minutes or until deep golden brown.
- Once crispy, remove the rice balls with a slotted spoon and let drain on paper towels.