
Table of Contents
Table of Content
A few years ago, on a particularly chilly evening, I stumbled upon my Instant Pot while rummaging through my kitchen cabinets. Dusty and ignored, it whispered promises of deliciously cooked meals that just didn’t happen to materialize. That night, with a craving for something wholesome, I decided to give brown rice a go. As the instant pot worked its magic, the aroma of nutty rice wafted through the air, wrapping around my kitchen like a warm hug. Just twenty-two minutes later, I opened the lid to find fluffy grains softly steaming, ready to be paired with everything from sautéed veggies to savory stews. That first bite was divine! It was like a cozy blanket for my soul, and I knew right then and there that this would be a staple in my home. With rich flavors and an ease that felt almost too good to be true, I knew readers would fall in love with it just as I did.
Why You’ll Love This Recipe
- Easy to Prepare: Let your Instant Pot do the work while you relax or whip up another dish!
- Quick Cooking Time: Just 22 minutes ensures you’ll have dinner on the table in no time.
- Healthier Option: Brown rice is packed with nutrients and fiber, making it a wholesome sidekick for your meals.
- Delicious and Flavorful: With just a hint of oil or butter, it becomes a creamy canvas for whatever you choose to add.
- Versatile: Perfect for meal prep or pairing with an array of dishes—it complements everything beautifully!
Ingredients
- 1 cup brown rice: Choose high-quality short or long-grain brown rice for the best texture.
- 2 cups water or broth: Using broth will infuse the rice with an extra layer of flavor; vegetable or chicken broth works wonders.
- 1 tablespoon olive oil or butter: Adds a rich creaminess; use olive oil for a lighter taste, or butter for that nostalgic comfort.
- Salt to taste: A pinch of salt elevates the flavors; adjust to your preference!
Full recipe card is below.
How to Make It
1. Rinse the Brown Rice
Begin by rinsing the brown rice under cold water. This essential step washes away excess starch, preventing the rice from becoming gummy. With each rinse, the water transforms from cloudy to clear, promising a lighter, fluffier outcome.
2. Add Ingredients to the Instant Pot
Next, add the rinsed rice, water (or broth), olive oil, and a pinch of salt to your Instant Pot. As you pour everything in, take a moment to admire the colors—earthy brown rice mingling with shimmering liquid, ready to transform into something magical.
3. Close the Lid and Set to ‘Sealing’
Close the lid securely—there’s something incredibly satisfying about this step. Switch the valve to ‘Sealing’ and give the lid a gentle press to ensure it’s locked. A little tap-tap can make a world of difference!
4. Cook on ‘Manual’ or ‘Pressure Cook’ for 22 Minutes
Set your Instant Pot to ‘Manual’ or ‘Pressure Cook’ for 22 minutes. Here’s where the magic happens! As the pressure builds, the warmth spreads through your kitchen, igniting anticipation for a nourishing meal.
5. Allow for a Natural Pressure Release
When the timer buzzes cheerfully, allow the pot to naturally release pressure for 10 minutes. This means you can wash a few dishes or sip on a cozy cup of tea while it does its thing. Afterward, carefully quick-release any remaining pressure—your apartment will smell fabulous!
6. Fluff the Rice and Serve
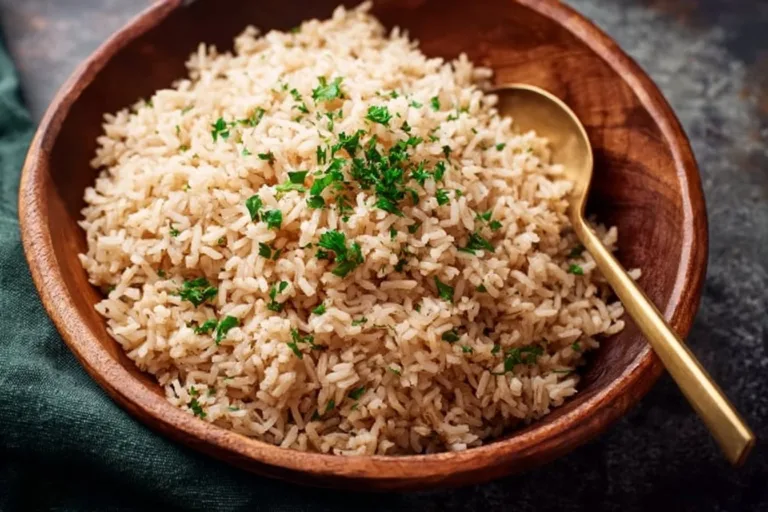
Finally, remove the lid and use a fork to fluff the rice. The grains will be delicate and light, ready to soak up any sauce or embellishments. Serve it warm alongside your favorite dishes!
Pro Tips for Success
- Choose Quality Rice: Investing in good brown rice makes a noticeable difference in texture and flavor.
- Use Broth for Flavor: Resist the urge to skip the broth—it adds a depth you won’t want to miss!
- Rinse Thoroughly: Don’t rush this step; a good rinse prevents clumping.
- Check Your Instant Pot: Make sure the sealing ring is properly fitted for optimal pressure cooking.
Flavor Variations
Spice things up with these fun twists:
- Herbed Rice: Add a teaspoon of dried oregano or thyme for an aromatic flair.
- Curry-Inspired: Stir in a spoonful of curry powder before cooking for a warm, spiced aroma.
- Seasonal Touches: Toss in some sautéed mushrooms or seasonal veggies before serving for a pop of color and nutrients.
Serving Suggestions
Pair your fluffy Instant Pot brown rice with stir-fried veggies, stews, grilled meats, or even a zesty bean salad for a filling meal. Serve it in a beautiful bowl to show off the texture and color. For a cozy dinner, enjoy with a glass of chilled white wine or a warm herbal tea as you dig into your comforting creation.
Make-Ahead & Storage
Cook a batch in advance and save it for busy days! Store the rice in an airtight container in the fridge for up to 4-5 days. Portion it out for easy meals throughout the week.
Leftovers
Transform leftover brown rice into a filling fried rice dish or a delicious rice bowl topped with your favorite proteins and veggies. It’s a great way to give new life to yesterday’s leftovers!
Freezing
Absolutely! Portion any extra rice into freezer-safe containers or bags, and it’ll stay fresh for up to 3 months. When you’re ready to enjoy, just thaw in the fridge overnight or reheat directly from frozen.
Reheating
The best way to reheat your rice is on the stovetop with a splash of water to create steam, which keeps it fluffy. Alternatively, you can use a microwave—just sprinkle a little water on top, cover, and heat until warmed through.
FAQs
Can I use white rice instead of brown?
Absolutely, but keep in mind that white rice cooks much faster—follow your Instant Pot guide for white rice cooking times.
Can I double this recipe?
Certainly! Just make sure not to exceed your Instant Pot’s maximum fill line, and keep the cooking time the same.
What can I do if my rice is too mushy?
Next time, try using slightly less water or reduce the cooking time by a couple of minutes for firmer rice.
Can I add spices directly to the rice while cooking?
Yes! Feel free to add spices or herbs for extra flavor before you start the cooking process.
Final Thoughts
Cooking brown rice in the Instant Pot is like welcoming a warm fire into your home—it creates a sense of comfort and simplicity. With its earthy flavor and nutritious profile, this dish has become a beloved treasure in my kitchen. I hope it brings you the same cozy joy and flavor-filled adventures as it has for me. So grab your Instant Pot, add those ingredients, and let the warm embrace of homemade brown rice fill your kitchen—every grain tells a story, and I can’t wait for you to create yours!

Instant Pot Brown Rice
Ingredients
Method
- Rinse the brown rice under cold water to wash away excess starch, preventing the rice from becoming gummy.
- Add the rinsed rice, water (or broth), olive oil, and a pinch of salt to your Instant Pot.
- Close the lid securely and switch the valve to ‘Sealing’.
- Set your Instant Pot to ‘Manual’ or ‘Pressure Cook’ for 22 minutes.
- When the timer buzzes, allow the pot to naturally release pressure for 10 minutes.
- Carefully quick-release any remaining pressure and fluff the rice with a fork.