
Oh my sweet, cozy kitchen! I still remember the first time I stumbled upon these delightful Chocolate Hot Cups. It was a snowy afternoon, the kind that begs you to stay inside wrapped in a blanket with a good book and a cup of something warm. With warm chocolate aromas wafting through the air, I decided to experiment a bit, hoping for a magical drink that would wrap me in comfort. What started as a simple idea quickly turned into a kitchen adventure filled with melted chocolate, candy cane crunch, and fluffy marshmallows! The result? A warm hug in a cup that melted my worries away and became an instant favorite among family and friends. Trust me, once you taste these, you’ll understand why they’re so adored – they’re truly the embodiment of cozy!
Table of Contents
Why You’ll Love This Recipe
- Super Easy: You don’t need fancy skills; just a bit of melting and pouring!
- Perfectly Quick: Whip up a batch in under 30 minutes for any occasion.
- Healthy Twist: You can customize with low-sugar options or dairy-free chocolate!
- Flavor-Packed: The combo of chocolate, peppermint, and marshmallows is irresistible.
- Crowd-Pleasing: Whether it’s a family gathering or a cozy date night, everyone loves these!
- Make It Yours: Easily adapt the flavors to fit the season or your cravings.
Ingredients
- Disposable Cups: These are key to creating perfectly shaped chocolate cups – the fun and easy way to serve your hot chocolate!
- Melted Milk Chocolate: The star of the show! Choose high-quality chocolate for a richer flavor that’ll make your taste buds dance.
- Candy Canes: Crushed bits add festive flavor and a delightful crunch! Use mini ones for cuteness.
- Cocoa Powder: A dash of cocoa enhances the chocolateiness and deepens the flavor!
- Mini Marshmallows: Fluffy and sweet, these are a must for that delightful topping.
- Granulated Sugar: This adds a little sparkle and sweetness to your decorations!
Full recipe card is below.
How to Make It
Step 1: Melt the Chocolate
Slowly melt the chocolate in a double boiler or pop it in the microwave on low power. If you’re using the microwave, go for short bursts, stirring in between, until it’s silky smooth. The smell of melting chocolate is like a cozy blanket hugging your kitchen—it’ll make you swoon!
Step 2: Shape the Cups
Carefully pour the melted chocolate into the disposable cups. Swirl them gently to coat the sides evenly, almost like giving them a gentle chocolate spa day. Let them set in the refrigerator for about 15 minutes, then repeat this process to ensure the cups are nice and stable.
Step 3: Remove the Cups
Once the chocolate has hardened, carefully peel away the cups. You’re left with beautiful little chocolate vessels, ready to be filled with cozy goodness!
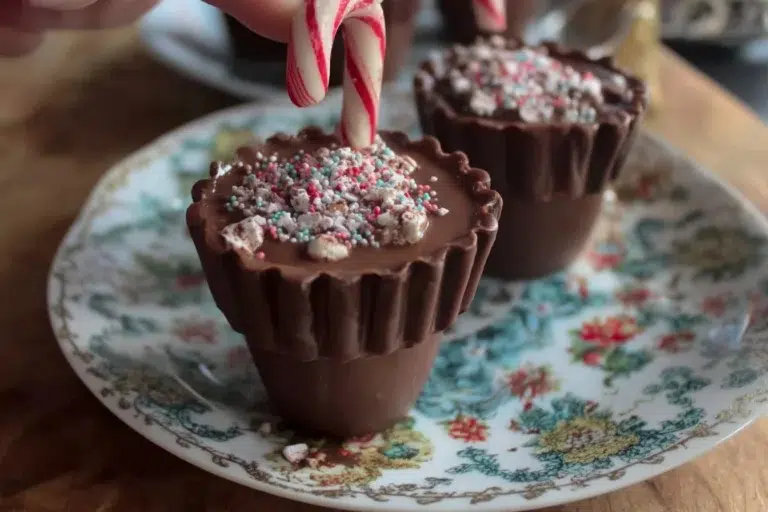
Step 4: Add Candy Canes
Pour a bit more melted chocolate into each chocolate cup and stick those crushed candy canes inside. Let them dry for a bit. The sweet peppermint aroma is simply divine, and watching those little bits of candy peek through is just too cute!
Step 5: Add Cocoa and Marshmallows
Now it’s time for the fun part! Add 2 teaspoons of cocoa powder into each chocolate cup, followed by a sprinkle of mini marshmallows on top. Drizzle a little more melted chocolate over the marshmallows to make them stick. Talk about a fluffy mountain of deliciousness!
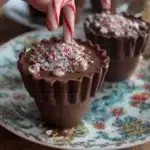
Step 6: Decorate and Serve
Decorate everything with a bit of melted chocolate and granulated sugar for that gorgeous touch. Lastly, dip the outside of the cups back into the melted chocolate for an extra layer of richness. To enjoy, simply place one of these cuties in a mug of hot milk, wait a bit, and stir it well—oh, the creamy goodness is just waiting to warm your soul!
Pro Tips for Success
- Quality Chocolate: Choose good quality melted chocolate for the best flavor and smoothness.
- Easy Removal: Make sure the chocolate is fully set before peeling the cups away to prevent breakage.
- Personalize It: Experiment with different toppings like caramel drizzle, whipped cream, or flavored extracts!
- Chill Out: Keep your cups in the fridge until you’re ready to use them for the best texture.
Flavor Variations
- Seasonal Spices: Add a sprinkle of cinnamon or nutmeg for a cozy, fall twist!
- Nutty Chocolate: Consider mixing hazelnut or almond extract into the melted chocolate for a lovely nutty flavor.
- Dairy-Free Option: Swap to dark or dairy-free chocolate for a delightful treat without dairy!
Serving Suggestions
Pair your Chocolate Hot Cups with some fluffy whipped cream on top, a sprinkle of cocoa powder, or even a candy cane stirrer for an extra festive flair. They make the most delightful gift when arranged in a wooden crate, maybe alongside some homemade cookies or gingerbread.
Make-Ahead & Storage
Prepare the chocolate cups a day or two in advance! Store them in an airtight container in the fridge to keep them fresh and ready for your hot chocolate craving.
Leftovers
If you have any leftover chocolate, you can use it to dribble over fruits like strawberries or apples for a quick dessert. The possibilities are sweetly endless!
Freezing
While the Chocolate Hot Cups are best fresh, they can be frozen! Layer them between parchment paper, wrap them tightly, and store in the freezer for up to a month. Just remember to let them thaw at room temperature before using.
Reheating
If you happen to have extras of the melted chocolate, simply reheat it in the microwave or a double boiler until smooth. Always remember to handle chocolate with love—don’t rush the process!
FAQs
Can I use dark chocolate instead?
Absolutely! Dark chocolate adds a rich flavor and can be a healthier alternative too!
What if I don’t have disposable cups?
You can use silicone molds or even muffin tins lined with parchment paper for similar results.
Can kids help with this recipe?
Of course! This is a fun, hands-on recipe they’ll love—and it’s perfection for quality family time!
How do I prevent my chocolate from seizing?
Make sure to keep water away from melting chocolate—always dry your utensils and bowls fully before melting for the best results.
Final Thoughts
Oh, my lovely cookie-scented kitchen aficionados, I hope you feel inspired to bring these Chocolate Hot Cups into your home and share the warmth! There’s something truly special about creating cozy memories through simple, delicious food, and I can’t wait for you to experience the joy that these cups bring. So gather your loved ones, dig into this delightful project, and let every sip be a reminder of the warmth and magic in your kitchen. Until next time, happy cooking! With warmth and chocolatey hugs,
Chef Emily
Chocolate Hot Cups
Ingredients
Method
- Step 1: Melt the Chocolate – Slowly melt the chocolate in a double boiler or microwave on low power.
- Step 2: Shape the Cups – Pour melted chocolate into disposable cups and swirl to coat the sides, then refrigerate for 15 minutes to set.
- Step 3: Remove the Cups – Carefully peel away the cups, leaving chocolate vessels.
- Step 4: Add Candy Canes – Pour more melted chocolate into each cup and stick in crushed candy canes, then let them dry.
- Step 5: Add Cocoa and Marshmallows – Add cocoa powder and mini marshmallows, then drizzle with more melted chocolate.
- Step 6: Decorate and Serve – Decorate with melted chocolate and sugar, then serve in hot milk.