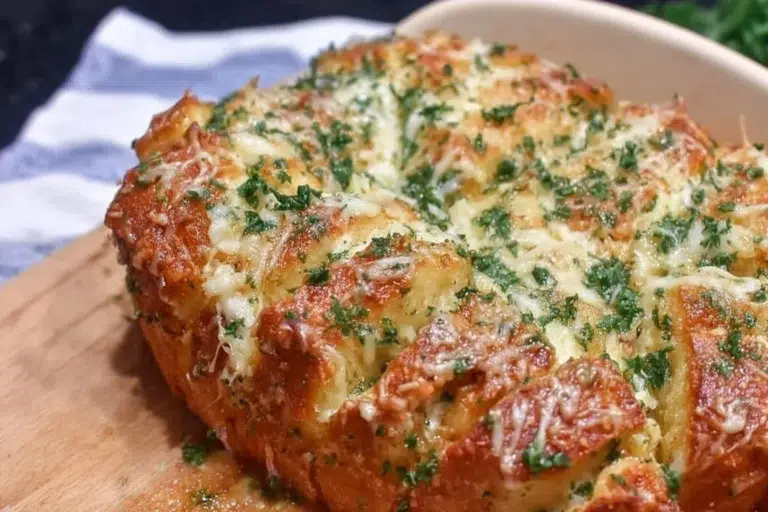
Hey there, food friends! It’s Chef Emily here from vibingRecipes.com, and today I’m absolutely bubbling with excitement to share a delightful recipe that has taken TikTok and our cozy kitchens by storm: Cheesy Hawaiian Roll Garlic Bread.
Table of Contents
I stumbled upon this gem while scrolling through my feed one afternoon, lured in by the tantalizing visuals of buttery goodness and oozing cheese. The moment I tried it, I was hooked! You see, there’s something truly special about the way those fluffy, sweet Hawaiian rolls soak up the garlic-butter goodness, becoming a warm, cheesy blanket of flavor with every bite. Imagine the inviting aroma of melting butter and garlic wafting through your kitchen, wrapping you up in a cozy embrace, as you pull these luscious rolls from the oven. Trust me, your home will feel like a warm bakery, and your belly will thank you!
So, grab your apron and let’s get started—you’re going to love this recipe as much as I do!
Why You’ll Love This Recipe
- Easy to Make: Just a few simple ingredients come together for a totally impressive dish!
- Quick to Prep: You can whip this up in about 30 minutes—perfect for those unexpected guests!
- Crowd-Pleasing: Everyone loves cheese, bread, and garlic—need I say more?
- Comforting & Flavorful: The combination of sweet and savory melts together perfectly.
- Perfect for Any Occasion: Whether it’s a casual dinner, a picnic, or a party, these little rolls fit right in!
Ingredients
- 12-16 count Hawaiian rolls: (Cut two slits into the top of each roll, halfway through) – These sweet rolls are the star here! Their fluffy texture pairs beautifully with the savory ingredients.
- 1 stick salted butter (softened) – Butter adds richness and flavor, ensuring everything comes together beautifully.
- 1 tbsp chopped fresh parsley (washed thoroughly) – Fresh herbs brighten up the dish and add a pop of color!
- 2 1/2 tbsp minced garlic – The more garlic, the better! It brings that aromatic punch that makes this dish truly addictive.
- 1 tbsp grated Parmesan cheese – This adds a nutty flavor that complements the mozzarella perfectly.
- 1 1/2 cups shredded mozzarella cheese – The gooier, the better! Mozzarella makes this dish extremely cheesy and delightful.
Full recipe card is below.
How to Make It
Step 1: Prepare the Rolls
Put the prepared rolls into a buttered 9×13″ baking dish. Make sure to arrange them snugly, because nothing’s better than sharing the cheesy goodness!
Step 2: Stuff the Cheese
Stuff the slits with the cheese. As you’re doing this, let the gooey mozzarella peek out just a little for that melt-in-your-mouth magic!
Step 3: Whip Up the Garlic Butter
In a small bowl, combine the softened butter, chopped parsley, and minced garlic. Whisk together until evenly combined. Oh, the smell of this mixture is heavenly—garlic lovers, rejoice!
Step 4: Spread the Magic
Spread the seasoned butter mixture evenly over the tops of the cheese-stuffed rolls. Get generous here—everyone deserves a bit of extra loving!
Step 5: Bake to Perfection
Bake at 400° for 9-11 minutes until the cheese is melted and the rolls are golden brown. Keep an eye on them! The kitchen will smell divine, and you won’t be able to resist that glorious cheesiness!
Step 6: Serve & Enjoy!
Serve these warm and watch them disappear! They’re perfect as a side or a tasty snack. Don’t forget to enjoy every last cheesy bite!
Pro Tips for Success
- Use fresh garlic for the best flavor. If you’re in a hurry, garlic powder works in a pinch!
- Don’t skimp on the butter—it’s truly the secret to making these rolls irresistible!
- Let the rolls cool for a couple of minutes before digging in to keep your fingers safe from the molten cheese!
Flavor Variations
- Herbed with a Twist: Add some red pepper flakes for a bit of heat, or mix in some Italian seasoning.
- Cheesy Combo: Swap some mozzarella for cheddar for a richer flavor.
- Add Veggies: Finely chop some spinach or bell peppers and mix them into the cheese for a veggie boost.
Serving Suggestions
These cheesy rolls pair perfectly with a fresh garden salad, a bowl of soup, or even as an addition to your favorite pasta dish. Just imagine them plated on a lovely wooden board, drizzled with some balsamic glaze—so inviting! And for drinks, a chilled glass of white wine elevates this comforting dish even more.
Make-Ahead & Storage
You can prep these rolls ahead by cutting the slits and mixing the garlic butter the day before. Just assemble them before baking! If you have leftovers (which is rare), store them in an airtight container in the fridge for 2-3 days.
Leftovers
Even though they’re best fresh, you can reinvent leftovers by turning them into a cheesy garlic bread sandwich! Throw in some leftover meat or veggies and toast them up for a delightful lunch.
Freezing
Yes, you can freeze these rolls! Wrap the assembled but unbaked rolls tightly in plastic wrap and foil. They’ll keep in the freezer for about a month. Thaw in the fridge overnight before baking!
Reheating
To reheat, pop them in the oven at 350° for about 10 minutes until warmed through. You can also use a skillet on low heat covered with a lid to maintain their soft texture. The microwave works too, but watch carefully to keep them from getting chewy.
FAQs
Can I use unsalted butter instead of salted?
Yes, but you might want to add a pinch of salt to enhance the flavor!
What if I don’t have garlic?
You can use garlic powder, though fresh garlic is best for that aromatic kick!
Can I use other types of rolls?
Absolutely! Any soft dinner rolls will work; just ensure they’re on the sweet side for that perfect balance.
How do I make this recipe gluten-free?
You can use gluten-free rolls to make this dish accessible for those with gluten sensitivities.
Final Thoughts
Thanks for joining me on this delightful cooking adventure! I hope you find joy in creating this Cheesy Hawaiian Roll Garlic Bread and that it fills your home with warmth and laughter. Remember, every bite is a chance to share love (and cheese!) with your family and friends. Happy cooking, and may your kitchen always smell as divine as your taste buds deserve! Until next time, keep vibing and experimenting in your kitchen!
Much love from your kitchen buddy,
Chef Emily 🌼

Cheesy Hawaiian Roll Garlic Bread
Ingredients
Method
- Put the prepared rolls into a buttered 9×13 baking dish, snugly arranged.
- Stuff the slits with mozzarella cheese, allowing some to peek out for extra meltiness.
- In a small bowl, combine softened butter, chopped parsley, and minced garlic; whisk until evenly combined.
- Spread the garlic butter mixture generously over the tops of the cheese-stuffed rolls.
- Bake at 400° for 9-11 minutes until cheese is melted and rolls are golden brown.
- Serve warm and enjoy!

