
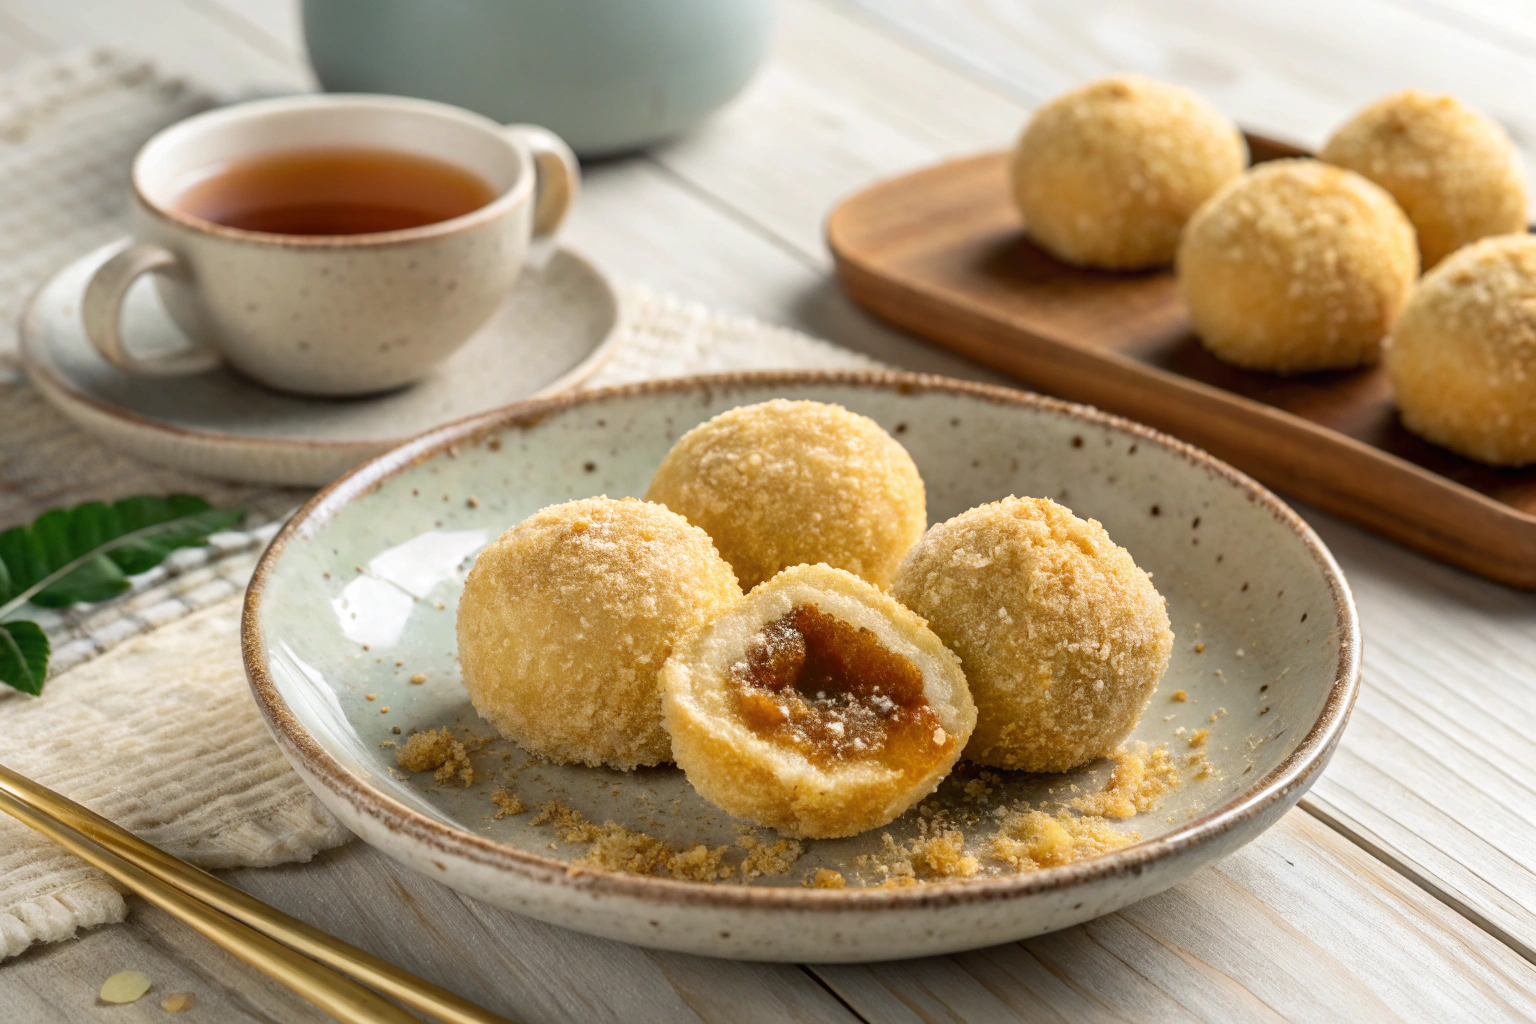
Golden Mochi Balls are the perfect marriage of crispy, chewy, and sweet—and honestly, they’re borderline addictive. Picture this: a warm, golden-brown shell that gives way to a stretchy mochi interior, with a gooey brown sugar filling that melts in your mouth. Whether you fry them for that extra crunch or bake for a lighter bite, these bite-sized beauties are always a hit. Trust me, if you’ve never made homemade mochi before, this is the recipe to start with!
Table of Contents
Why You’ll Love This Recipe
- Crispy on the outside, chewy on the inside—a textural dream come true.
- Totally customizable—you can tweak the filling or coating to suit your vibe.
- Perfect for sharing (or hoarding, no judgment here).
- Quick to make and even quicker to disappear.
- Uses simple pantry ingredients but delivers big flavor.
Recipe Snapsho
| Feature | Details |
|---|---|
| Category | Dessert |
| Prep Time | 20 minutes |
| Cook Time | 10 minutes |
| Total Time | 30 minutes |
| Recipe Yield | About 8 golden mochi balls |
| Focus Keyword | Golden Mochi Balls |
| Difficulty Level | Easy |
Ingredients
Here’s what you’ll need to make these Golden Mochi Balls:
- Glutinous rice flour – The key to that signature chewy mochi texture.
- Boiling water – Helps dissolve the sugar and bind the dough.
- Sugar – Just enough to sweeten the dough without overpowering the filling.
- Breadcrumbs – For that crisp golden coat after frying or baking.
For the Filling:
- Brown sugar – Deep, caramel-y sweetness that oozes when warm.
- Glutinous rice flour – Thickens the filling so it doesn’t leak.
- White sesame seeds (optional) – Add a subtle nutty crunch and extra aroma.
Scroll down to the recipe card for exact quantities and baking tips!
How to Make Golden Mochi Balls
1. Make the Filling
In a small bowl, mix together brown sugar, glutinous rice flour, and sesame seeds (if using). Set aside. This mix will slightly melt into a thick, gooey center once cooked. Yum!
2. Prepare the Mochi Dough
In a heatproof bowl, dissolve the sugar in boiling water. Pour this sugary hot water into your glutinous rice flour and stir with chopsticks or a spatula until a shaggy dough forms.
Once it’s cool enough to handle, knead it until smooth. If it’s sticky, lightly dust your hands with flour.
3. Cook & Mix the Dough
Take 4 small pieces of dough and boil them for about 5 minutes until they float. This step helps improve elasticity—don’t skip it! Mix the cooked dough back into the main dough and knead again until fully combined.
4. Fill and Shape
Divide your dough into roughly 35g portions. Flatten each one, add a bit of filling in the center, then roll into small cylinders or balls—your call. Coat generously with breadcrumbs for that golden crunch.
5. Fry or Bake
- To Fry: Heat oil and fry the mochi balls until they’re golden and crisp. Keep an eye on them—they cook fast!
- To Bake: Preheat your oven to 200°C. Bake for 3–5 minutes, covering with foil if they brown too quickly.
Pro Tips for Perfect Mochi Balls
- Don’t overfill or your mochi may burst open.
- Wet your fingers slightly when shaping to prevent sticking.
- Fry in batches to avoid overcrowding the pan.
- Serve immediately for that unbeatable hot-crispy-soft combo!
Flavor Variations
- Coconut sugar instead of brown sugar for a tropical twist.
- Add mini chocolate chips for a melty surprise.
- Sprinkle flaky sea salt on top to balance the sweetness.
- Try crushed roasted peanuts in the filling for a nutty flair.
Serving Suggestions
- Serve warm with a drizzle of condensed milk.
- Pair with green tea or jasmine tea for the ultimate tea-time snack.
- Dust with powdered sugar for a dessert platter-worthy finish.
Make-Ahead & Storage
Want to prep ahead? No problem!
- Make-Ahead: Shape and breadcrumb the mochi balls, then refrigerate for up to 24 hours before cooking.
- Leftovers: Store cooked mochi balls in an airtight container at room temperature for one day or refrigerate for up to 3 days.
Freezing & Reheating
- To Freeze: Place uncooked or cooked mochi balls on a tray, freeze until solid, then store in a ziplock bag.
- To Reheat: Pop them in a preheated 200°C oven for about 8 minutes, covered with foil to retain moisture and avoid burning the crumbs.
FAQs
Can I use regular rice flour instead of glutinous rice flour?
Nope! You need glutinous rice flour for that signature chewy texture. Regular rice flour won’t cut it.
Can I make these in an air fryer?
Absolutely! Air fry at 200°C for 6–8 minutes. Give them a light spray of oil for extra crispiness.
What’s the best oil for frying?
Neutral oils like canola or vegetable oil work best—they won’t overpower the flavor.
How do I know when the mochi balls are done?
They’ll turn beautifully golden brown and float if frying. If baking, they should look toasted and feel slightly firm to the touch.
Final Thoughts
There’s something magical about Golden Mochi Balls—that crackly crust, the warm, chewy center, and the sweet surprise hidden inside. Whether you’re new to mochi or a long-time lover of all things chewy and golden, this recipe brings comfort, nostalgia, and joy in every bite. So go ahead—grab your glutinous rice flour, and let’s get rolling.

Golden Mochi Balls
Ingredients
Mochi Dough
- 1 cup glutinous rice flour
- 1/2 cup boiling water
- 2 tbsp sugar
- 1/2 cup breadcrumbs
Filling
- 1/4 cup brown sugar
- 1 tbsp glutinous rice flour for thickening filling
- 1 tbsp white sesame seeds optional
Instructions
- In a small bowl, mix together brown sugar, glutinous rice flour, and sesame seeds (if using). Set aside.
- In a heatproof bowl, dissolve sugar in boiling water. Pour into the glutinous rice flour and stir until a dough forms.
- When cool enough to handle, knead the dough until smooth. If sticky, lightly flour your hands.
- Boil 4 small pieces of dough for 5 minutes until they float, then knead back into the main dough.
- Divide dough into 35g portions, flatten, add filling, and shape into balls. Coat with breadcrumbs.
- Fry in hot oil until golden brown, or bake at 200°C for 3–5 minutes until golden and crisp.