
Table of Contents
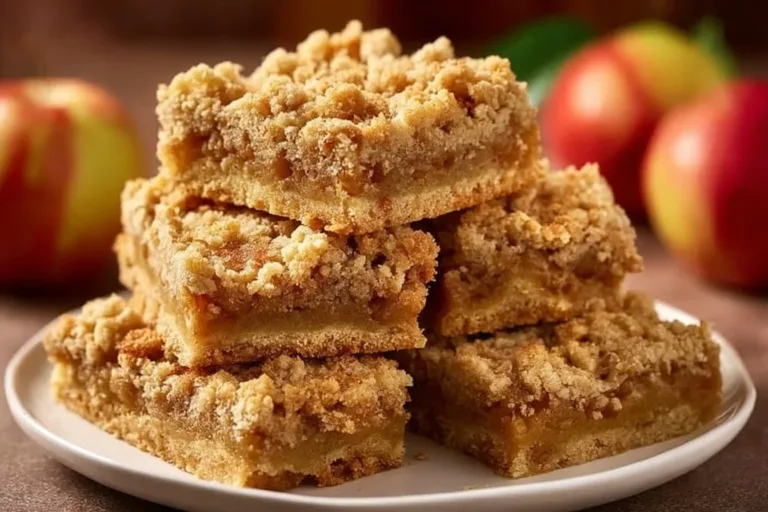
Oh, friends! Let me take you back to a crisp autumn day a few years ago when my kitchen was filled with the comforting scents of cinnamon, warm apples, and buttery crust. I had stumbled upon this delightful recipe for Easy Apple Pie Bars, and it quickly became a family favorite! The sun streamed through the windows, casting a glow on the flour-dusted countertops as I sliced into the first warm bar straight out of the oven. The first bite was pure happiness: a blend of sweet, tart apples enveloped in a crumbly crust that had just the right amount of crunch! It was a nostalgic nod to the apple pies of my childhood, but so much easier to make. Now, every time I whip up a batch, I’m reminded of those cozy moments and laughter around the table. Trust me, friends, you will adore these bars!
Why You’ll Love This Recipe
- Effortless: This recipe is so easy, even the most novice bakers can whip it up in no time!
- Quick Bake Time: With only 30-35 minutes in the oven, your delicious treat is just around the corner.
- Flavorful: The combination of sweet apples and warm spices is a guaranteed flavor explosion!
- Crowd-Pleasing: Ideal for gatherings, these bars are a hit with both kids and adults — who can resist a slice of apple pie?
- Customizable: Easily incorporate your favorite flavors or ingredients for a unique twist!
Ingredients
- 2 cups all-purpose flour: A staple for that perfectly chewy crust — make sure to spoon and level the flour for accurate measurement!
- 1 cup unsalted butter, melted: Adds a rich depth of flavor. Make sure it’s not too hot so it doesn’t cook the sugars!
- 1 cup brown sugar: For that deep, caramel-like sweetness that pairs perfectly with apples.
- 1/2 cup granulated sugar: Balances the rich brown sugar and gives a delightful light texture to your bars.
- 1 teaspoon cinnamon: The warm spice that evokes cozy memories and elevates the apple flavor to new heights!
- 1/2 teaspoon salt: Just a pinch enhances the sweetness and brings every flavor together.
- 3 cups shredded apples (about 3 medium apples): I love to use Granny Smith for a tart kick, but feel free to mix it up!
- 1 tablespoon lemon juice: Brightens up the apple filling and prevents browning — we want those apples fresh and vibrant!
- 1/4 cup rolled oats: For a little texture and heartiness, oh so good on top of those baked apples.
Full recipe card is below.
How to Make It
1. Preheat the Oven
Set your oven to 350°F (175°C). You want the kitchen to start warming up with that lovely anticipation!
2. Mix the Crust
In a large bowl, combine the flour, melted butter, brown sugar, granulated sugar, cinnamon, and salt. Mix until it resembles a soft dough. If it seems too crumbly, don’t fret; it should hold together when you press it!
3. Press the Crust
Grab a greased 9×13 inch baking dish and press half of the delicious crust mixture into the bottom. Use your fingers or a spatula for an even layer, creating the perfect base.
4. Prepare the Apples
In another bowl, toss your shredded apples with lemon juice. The citrus will help keep everything fresh and lively!
5. Spread the Apples
Pour that apple goodness over your pressed crust. Mmm, can you smell that? It’s simply irresistible!
6. Sprinkle the Topping
Now, gently scatter the remaining crust mixture over the apples. Then, top it off with the rolled oats for a homely crunch.
7. Bake to Perfection
Slide your dish into the oven and bake for 30-35 minutes. You’ll know it’s ready when the top is golden brown and your kitchen smells like a lovely bakery.
8. Cool and Slice
Allow the bars to cool for at least 15 minutes before slicing. I know it’s hard to resist, but trust me, they slice beautifully when slightly cooled!
Pro Tips for Success
- Choose the Right Apples: Combine tart and sweet apples for a flavor complexity that everyone will adore!
- Don’t Overmix: Once you combine the crust ingredients, mix just until combined to keep the bars tender and soft.
- Let Cool Fully: The bars can be crumbly if sliced too soon — it’s worth the wait!
- Experiment with Spices: Try adding nutmeg or allspice for an extra layer of warmth.
Flavor Variations
- Nutty Twist: Add 1/2 cup of chopped walnuts or pecans for crunch.
- Dried Fruits: A handful of raisins or cranberries can give an interesting sweet-tart balance.
- Spiced Up: A pinch of ginger or cloves can give a lovely, warm twist perfect for autumn!
Serving Suggestions
These bars are perfect on their own, but they shine brighter when served warm with a scoop of vanilla ice cream or a drizzle of caramel sauce. Pair them with a steaming cup of chai or a glass of cider for a delightful treat!
Make-Ahead & Storage
You can prepare the filling ahead of time and store it in the fridge for up to 2 days. The bars can also be baked and stored in an airtight container at room temperature for up to 5 days.
Leftovers
Leftover bars can be crumbled over yogurt for a lovely breakfast or mixed into oatmeal for a cozy brunch!
Freezing
Absolutely! Wrap the cooled bars in plastic wrap and then aluminum foil to prevent freezer burn. They’ll last up to 3 months.
Reheating
For the best results, reheat in the oven at 350°F for 10-15 minutes. You can also pop them in the microwave for about 30 seconds, but the oven gives you that lovely crisp back!
FAQs
Can I use store-bought applesauce instead of shredded apples?
Absolutely! Just make sure to adjust the sugar since applesauce can be sweeter.
What is the best way to shred apples?
Using a box grater works beautifully! Just be careful with those little fingers!
Can I double this recipe?
Yes! Just make sure to use a larger baking dish and increase the baking time slightly.
What if I don’t have brown sugar?
You can replace it with granulated sugar mixed with a tablespoon of molasses for that deep flavor.
Final Thoughts
Oh, my friends, I hope you find as much joy in creating these Easy Apple Pie Bars as I do! Each bite is like a warm hug from Grandma, filled with sweet nostalgia and love. So gather your ingredients, turn up your favorite tunes, and create a warm haven in your kitchen. Remember, every slice you share brings a smile to someone’s face. Happy baking—here’s to cozy kitchens and joyous gatherings! Enjoy! 🍏❤️