
Table of Contents
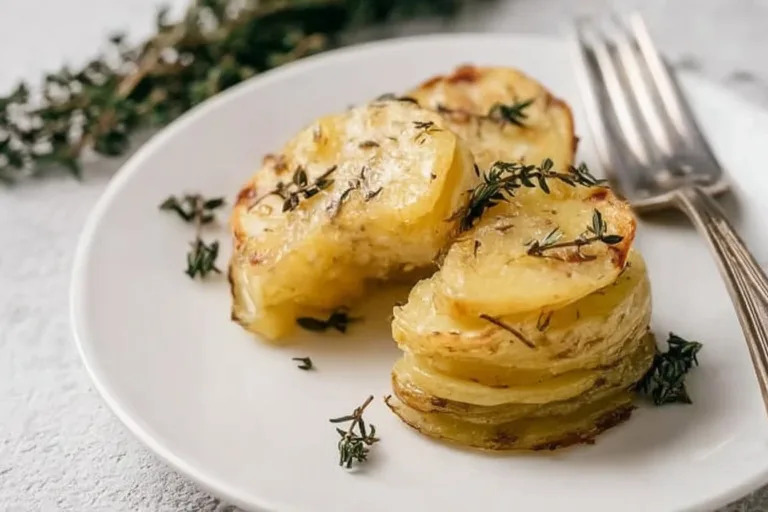
Oh, my dear friends, how I adore Cheesy Potato Stacks! Let me take you down memory lane to the very first time I made these irresistible little wonders. It was a chilly autumn evening, and the air was filled with the earthy aroma of roasted vegetables wafting in from a nearby farm market. I wanted something warm and snuggly to enjoy while curled up with a good book. So, armed with some humble potatoes and a generous sprinkle of cheese, I got to work crafting these delightful stacks. As they baked, the smell was nothing short of heavenly—a symphony of golden potatoes mingling with creamy cheese, drifting through my cozy kitchen like a warm hug.
The moment I pulled them out of the oven wasn’t just about the golden, crispy tops; it was about the joyful crunch when I took my first bite! Each layer was perfectly tender without sacrificing that delightful cheesy goodness. Since then, Cheesy Potato Stacks have found their way into my heart (and my dinner party menu!). They’re comfort food at its finest, and I know you’ll fall in love with them, too.
Trust me, once you savor these stacks, they’ll become a staple in your kitchen just like they are in mine!
Why You’ll Love This Recipe
- Easily Accessible: You probably already have everything you need right in your pantry.
- Simple Prep: Just slice, stack, and bake! Perfect for a cozy night in or last-minute gatherings.
- Crowd-Pleaser: These stacks are sure to impress your guests—everyone loves cheesy potatoes!
- Versatile: Great as a side dish or a hearty snack, they can do it all.
- Endlessly Customizable: You can mix and match with herbs and spices to suit your taste.
- Comforting Flavor: Warm, creamy, and cheesy—what’s not to love?
Ingredients
- Potatoes: The star of the show! Choose Russets or Yukon Golds for their buttery flavor and perfect texture.
- Cream: For that luxurious richness. You can use heavy cream or half-and-half for a slightly lighter option.
- Cheese: A blend of sharp cheddar and creamy mozzarella works wonders, giving you both flavor and gooeyness.
- Salt: Enhances all those lovely natural flavors. Don’t skip this!
- Pepper: A touch of spice to balance the richness—freshly cracked pepper is best.
- Garlic Powder: A sprinkle of garlic adds savory depth. If you’re a garlic lover, don’t hold back!
- Butter: Use it to grease the muffin tin; it ensures easy removal and adds flavor.
- Fresh Herbs (Optional): Parsley or chives make for a lovely fresh finish, but feel free to get creative!
Full recipe card is below.
How to Make It
1. Preheat Your Oven
Preheat your oven to 375°F (190°C). The warmth that fills your kitchen as the oven warms up is just the first step toward that cozy dinner!
2. Slice the Potatoes
Slice the potatoes thinly using a mandoline or sharp knife. Keep those slices about 1/8 inch thick. They should be thin enough to get crispy but thick enough to hold their shape.
3. Mix It Up
In a big bowl, mix the sliced potatoes with cream, cheese, salt, pepper, and garlic powder until well coated. Embrace the comforting mixture of cheesy, creamy goodness coating those beautiful potato slices!
4. Prepare the Muffin Tin
Grease muffin tins generously with butter. This little step is key; it ensures the stacks won’t stick and will come out nice and golden.
5. Stack the Potatoes
Take those beautifully-coated potato slices and stack them in the muffin tins, pressing down gently to form a little tower. It’s like building a cozy potato fortress!
6. Bake Away!
Pop the muffin tins into your preheated oven and bake for about 25-30 minutes, or until the potatoes are tender and golden brown. The aroma that will greet you? Pure bliss.
7. Cool and Unmold
Let them cool slightly before carefully removing from the muffin tins. A little patience here pays off!
8. Serve Warm
Enjoy them warm, garnished with fresh herbs if desired. The cheerful sight of these stacks is as delightful as their taste!
Pro Tips for Success
- Uniform Slices: Use a mandoline for even slicing to ensure all layers cook perfectly.
- Types of Cheese: Don’t be afraid to mix and match cheeses—try gouda or pepper jack for a spicy kick!
- Add Veggies: Layer in some cooked veggies like spinach or roasted bell peppers for extra flavor.
- Don’t Rush: Let the stacks cool a bit before taking them out; this helps them hold their shape.
- Experiment with Spices: Try adding some smoked paprika or a touch of cayenne for a flavor boost!
Flavor Variations
Get creative! Swap out the cream for Greek yogurt for a tangy twist, or add in some apple slices for a sweet surprise. Fresh thyme or rosemary can also add a fragrant twist to your stacks, especially during the holiday season!
Serving Suggestions
Serve these Cheesy Potato Stacks alongside a crisp salad for lunch or dinner. They pair beautifully with a nice glass of white wine or a warm mug of cider. For plating, arrange on a rustic wooden board for that lovely farmhouse touch.
Make-Ahead & Storage
You can prep the potato slices and mix them with the cream mixture ahead of time—store them in the fridge until you’re ready to bake! These stacks can last up to 3 days in the fridge, making them excellent for meal planning.
Leftovers
Transform any leftovers into a delightful breakfast hash! Just chop them up and sauté with a bit of onion and bell pepper for a cozy morning meal.
Freezing
While these stacks are best enjoyed fresh, they can be frozen before baking. Wrap tightly in plastic wrap, then foil, and freeze for up to a month. When you’re ready, thaw in the fridge overnight and then bake!
Reheating
Reheat them in the oven at 350°F (175°C) for about 10-15 minutes until heated through, or pop them in the microwave for a few minutes with a damp paper towel to keep them from drying out.
FAQs
Can I use different types of potatoes?
Absolutely! Yukon Golds or sweet potatoes work well, too—just adjust your baking time as needed.
Can I make these vegetarian?
Yes! This recipe is inherently vegetarian; just keep an eye on your cheese selection to avoid any animal rennet.
What if I don’t have muffin tins?
No worries! You can bake the stacks in a small baking dish; just be sure to layer them evenly and bake a bit longer.
How do I know when the potato stacks are done?
They should be golden brown on top and tender throughout; a fork should glide through without resistance.
Final Thoughts
Dear friends, as you embark on the journey of crafting your own Cheesy Potato Stacks, take a moment to feel the warmth of the kitchen and the joy of creating something beautiful. These stacks are more than just a recipe; they’re a way to gather around the table with loved ones, sharing laughter and stories over delicious food. So roll up those sleeves, let the cheese melt your worries away, and embrace the cozy vibes that only a lovingly prepared dish can bring.
Happy cooking, and may your kitchens always smell as delightful as mine does! 💖
Cheesy Potato Stacks
Ingredients
Method
- Preheat your oven to 375°F (190°C).
- Slice the potatoes thinly (about 1/8 inch thick) using a mandoline or sharp knife.
- In a big bowl, mix the sliced potatoes with cream, cheeses, salt, pepper, and garlic powder until well coated.
- Grease muffin tins generously with butter.
- Stack the coated potato slices in the muffin tins, pressing down gently to form little towers.
- Bake in the preheated oven for about 25-30 minutes, or until the potatoes are tender and golden brown.
- Let them cool slightly before carefully removing from the muffin tins.
- Enjoy warm, garnished with fresh herbs if desired.