
Table of Contents
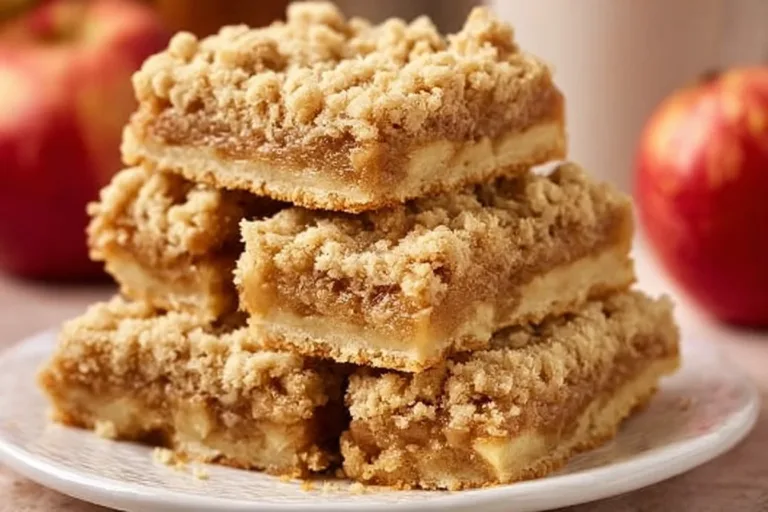
Ah, Apple Pie Bars. Just thinking about them brings me back to my grandma’s kitchen, where the sweet scent of cinnamon and baked apples would wrap around me like a cozy blanket. One chilly autumn afternoon, while trying to find a way to enjoy our family favorite without the fuss of a traditional pie, I stumbled upon this gem. The first bite was a revelation! Those warm, spiced apples nestled between a buttery, crumbly topping felt like a sweet hug, and ever since, these bars have become a staple in our home.
The beauty of Apple Pie Bars is not just in their delectable taste, but in the beautiful memories they create. As you slice into these golden squares, you’ll experience the aromatic wafts of cinnamon and baked apple mingle together in the air, making your kitchen feel like a delightful autumn haven. Trust me – this recipe will not only satisfy your sweet tooth but will also envelop you in the comforting embrace of nostalgia.
Why You’ll Love This Recipe
- Quick and Easy: Perfect for busy days or spontaneous cravings – no pie crust stressing here!
- Flavorful Delight: Bursting with sweet, spiced apples that will make your taste buds dance.
- Crowd-Pleasing Treat: Great for potlucks, family gatherings, or simply treating yourself.
- Nostalgic Warmth: Brings the cozy vibes of fall right into your kitchen.
- Customizable: Mix in your favorite nuts, dried fruits, or spices to make it your own!
- Perfect with Ice Cream: A scoop of vanilla ice cream on top? Yes, please!
Ingredients
- 1 cup all-purpose flour – The foundation for our crumbly topping. Opt for a spooned and leveled measurement for accuracy!
- 1 cup rolled oats – These add a lovely texture that makes your bars feel wholesome.
- 1/2 cup brown sugar – This gives the crust a deep caramel flavor; feel free to swap for white sugar for a lighter taste.
- 1/2 teaspoon cinnamon – The quintessential warm spice, which makes everything feel like a hug.
- 1/2 cup unsalted butter, melted – Essential for binding your mixture; go for unsalted for better flavor control.
- 4 cups shredded apples – Use a mix of tart and sweet apples for depth; Granny Smith and Honeycrisp work beautifully together.
- 2 tablespoons lemon juice – Brightens up the apple flavor and keeps them from browning.
- 1/4 cup granulated sugar – Sweetens the apple filling without overpowering it.
- 1 tablespoon cornstarch – Helps thicken the juicy apple filling for a perfect bar consistency.
- 1/4 teaspoon nutmeg – Adds a warm, cozy undertone; it pairs beautifully with cinnamon.
- 1/2 teaspoon vanilla extract – Elevates all the flavors and makes everything taste more delightful.
Full recipe card is below.
How to Make It
1. Preheat and Prepare
Preheat your oven to 350°F (175°C) and grease a 9×9 inch baking dish. The golden crust you’re about to make will need a non-stick surface to shine!
2. Crust Mixture
In a mixing bowl, combine the flour, oats, brown sugar, and cinnamon. Then drizzle in the melted butter and stir until the mixture is crumbly, like a sandy beach before the tide comes in.
3. Create the Base
Press about half of this crumbly goodness firmly into the bottom of your greased baking dish. You want a nice, sturdy base for the delicious apple filling to sit on.
4. Apple Filling Bliss
In another bowl, toss the shredded apples with lemon juice, granulated sugar, cornstarch, nutmeg, and vanilla. Imagine those warm spices dancing through your kitchen as you mix!
5. Assemble the Layers
Spread the apple mixture evenly over the crust, ensuring every square inch is covered in apple goodness.
6. Crumble Topping
Sprinkle the remaining crumbly mixture evenly over the top of the apples. This will create a lovely texture when baked!
7. Bake to Perfection
Pop your baking dish into the preheated oven and bake for 30-35 minutes, or until the top is beautifully golden brown. This is the part where your kitchen fills with mouth-watering aromas!
8. Slice & Serve
Once baked, remove from the oven and allow them to cool for a bit before slicing into squares. Trust me; the anticipation will be worth it!
Pro Tips for Success
- Use freshly shredded apples for the best flavor and texture.
- Don’t skip the lemon juice – it brightens up the flavor and keeps your apples fresh.
- Allow the bars to cool completely before slicing for cleaner cuts.
- Consider lining your baking dish with parchment paper for easier removal.
Flavor Variations
- Nutty Crust: Swap a portion of the oats for finely chopped nuts like pecans or walnuts for a delightful crunch.
- Spicy Twist: Add a pinch of ground ginger or allspice to the apple filling for extra warmth.
- Dried Fruits: Toss in some raisins or cranberries along with the apples for an added chewiness.
Serving Suggestions
Serve these Apple Pie Bars warm with a scoop of vanilla ice cream or a dollop of whipped cream on top. They’re also delightful with a warm cup of spiced cider or coffee, making for an utterly cozy autumn treat.
Make-Ahead & Storage
You can prepare the crust and the apple filling a day ahead and assemble right before baking. Once baked, store bars in an airtight container for up to a week at room temperature.
Leftovers
If you find yourself with leftovers (which is rare, I must say!), consider crumbling the bars over yogurt or oatmeal for a tasty breakfast or snack.
Freezing
Absolutely! Wrap individual bars in plastic wrap and then foil to keep out the moisture. They’ll keep in the freezer for up to three months. To thaw, place them in the fridge overnight.
Reheating
For the best results, reheat in the oven at 350°F (175°C) for about 10 minutes for a freshly baked feel. You can also microwave them for about 20-30 seconds if you’re in a hurry!
FAQs
Can I use other types of apples?
Absolutely! Feel free to mix or use your favorite types, like Fuji, Gala, or Braeburn.
What if I don’t have cornstarch?
You can substitute with an equal amount of all-purpose flour, though your filling will be slightly less thick.
Can I make these gluten-free?
Yes! Swap the all-purpose flour with a 1:1 gluten-free baking mix, and ensure your oats are certified gluten-free.
How do I know when they are done?
Look for a golden-brown top and bubbling filling around the edges. The aroma wafting through your kitchen will also give you a good hint!
Final Thoughts
Baking Apple Pie Bars isn’t just about making a delicious treat; it’s about creating a warm moment in your kitchen that you and your loved ones can savor. As the sweet, spiced aroma fills your home, you’ll be reminded of the warmth of family and the love baked into every square. So grab your apron, turn on your favorite tunes, and enjoy every step of this delightful baking adventure. Happy baking, my friends! 🍏🥧